Visual storytelling has the power to captivate, inspire, and communicate in ways that no other medium can match. Integrating videography into your content creation process allows you to take your work to new heights and engage your audience on deeper levels.
In this blog post, we dive into visual storytelling and the immense importance of videography in content creation. Whether you’re an aspiring content creator or an experienced videographer, this guide will equip you with valuable insights and actionable tips to boost your videography skills. From understanding the fundamentals of videography to mastering composition, lighting, audio, storytelling, and post-production, we leave no stone unturned.
Get ready to unlock the full potential of videography. Take your content creation to the next level. Let’s get started!
Understanding the Fundamentals of Videography
Videography is a dynamic and versatile medium that allows content creators to capture, edit, and produce compelling digital video content. This section will explore the essential elements of videography and equip you with a solid foundation to excel in this art form.
Definition and Scope of Videography
Videography is the art of capturing, editing, and producing videos that tell a story or convey a message. While it shares similarities with cinematography, videography often focuses on capturing live events in real-time, using more spontaneous recording techniques. It encompasses various video types, including time-lapse videos, interviews, product reviews, tutorials, promotional videos, event videography, and documentaries.
The Role of a Videographer in Content Creation
Videographers play a crucial role in the content creation process. They are responsible for capturing high-quality footage, selecting appropriate shots, and ensuring a visually engaging final product. While some videographers handle the entire video production process, including editing, others may collaborate with video editors during post-production.
Key Equipment and Tools for Videography
To create professional-looking videos, you need the right equipment and tools. Here are some essential items for your videography toolkit:
- Cameras and Lenses: Invest in a reliable camera that meets your specific needs, whether a DSLR, mirrorless camera, camcorder, or smartphone with advanced camera capabilities. Pair your camera with a selection of lenses to achieve different perspectives and visual effects.
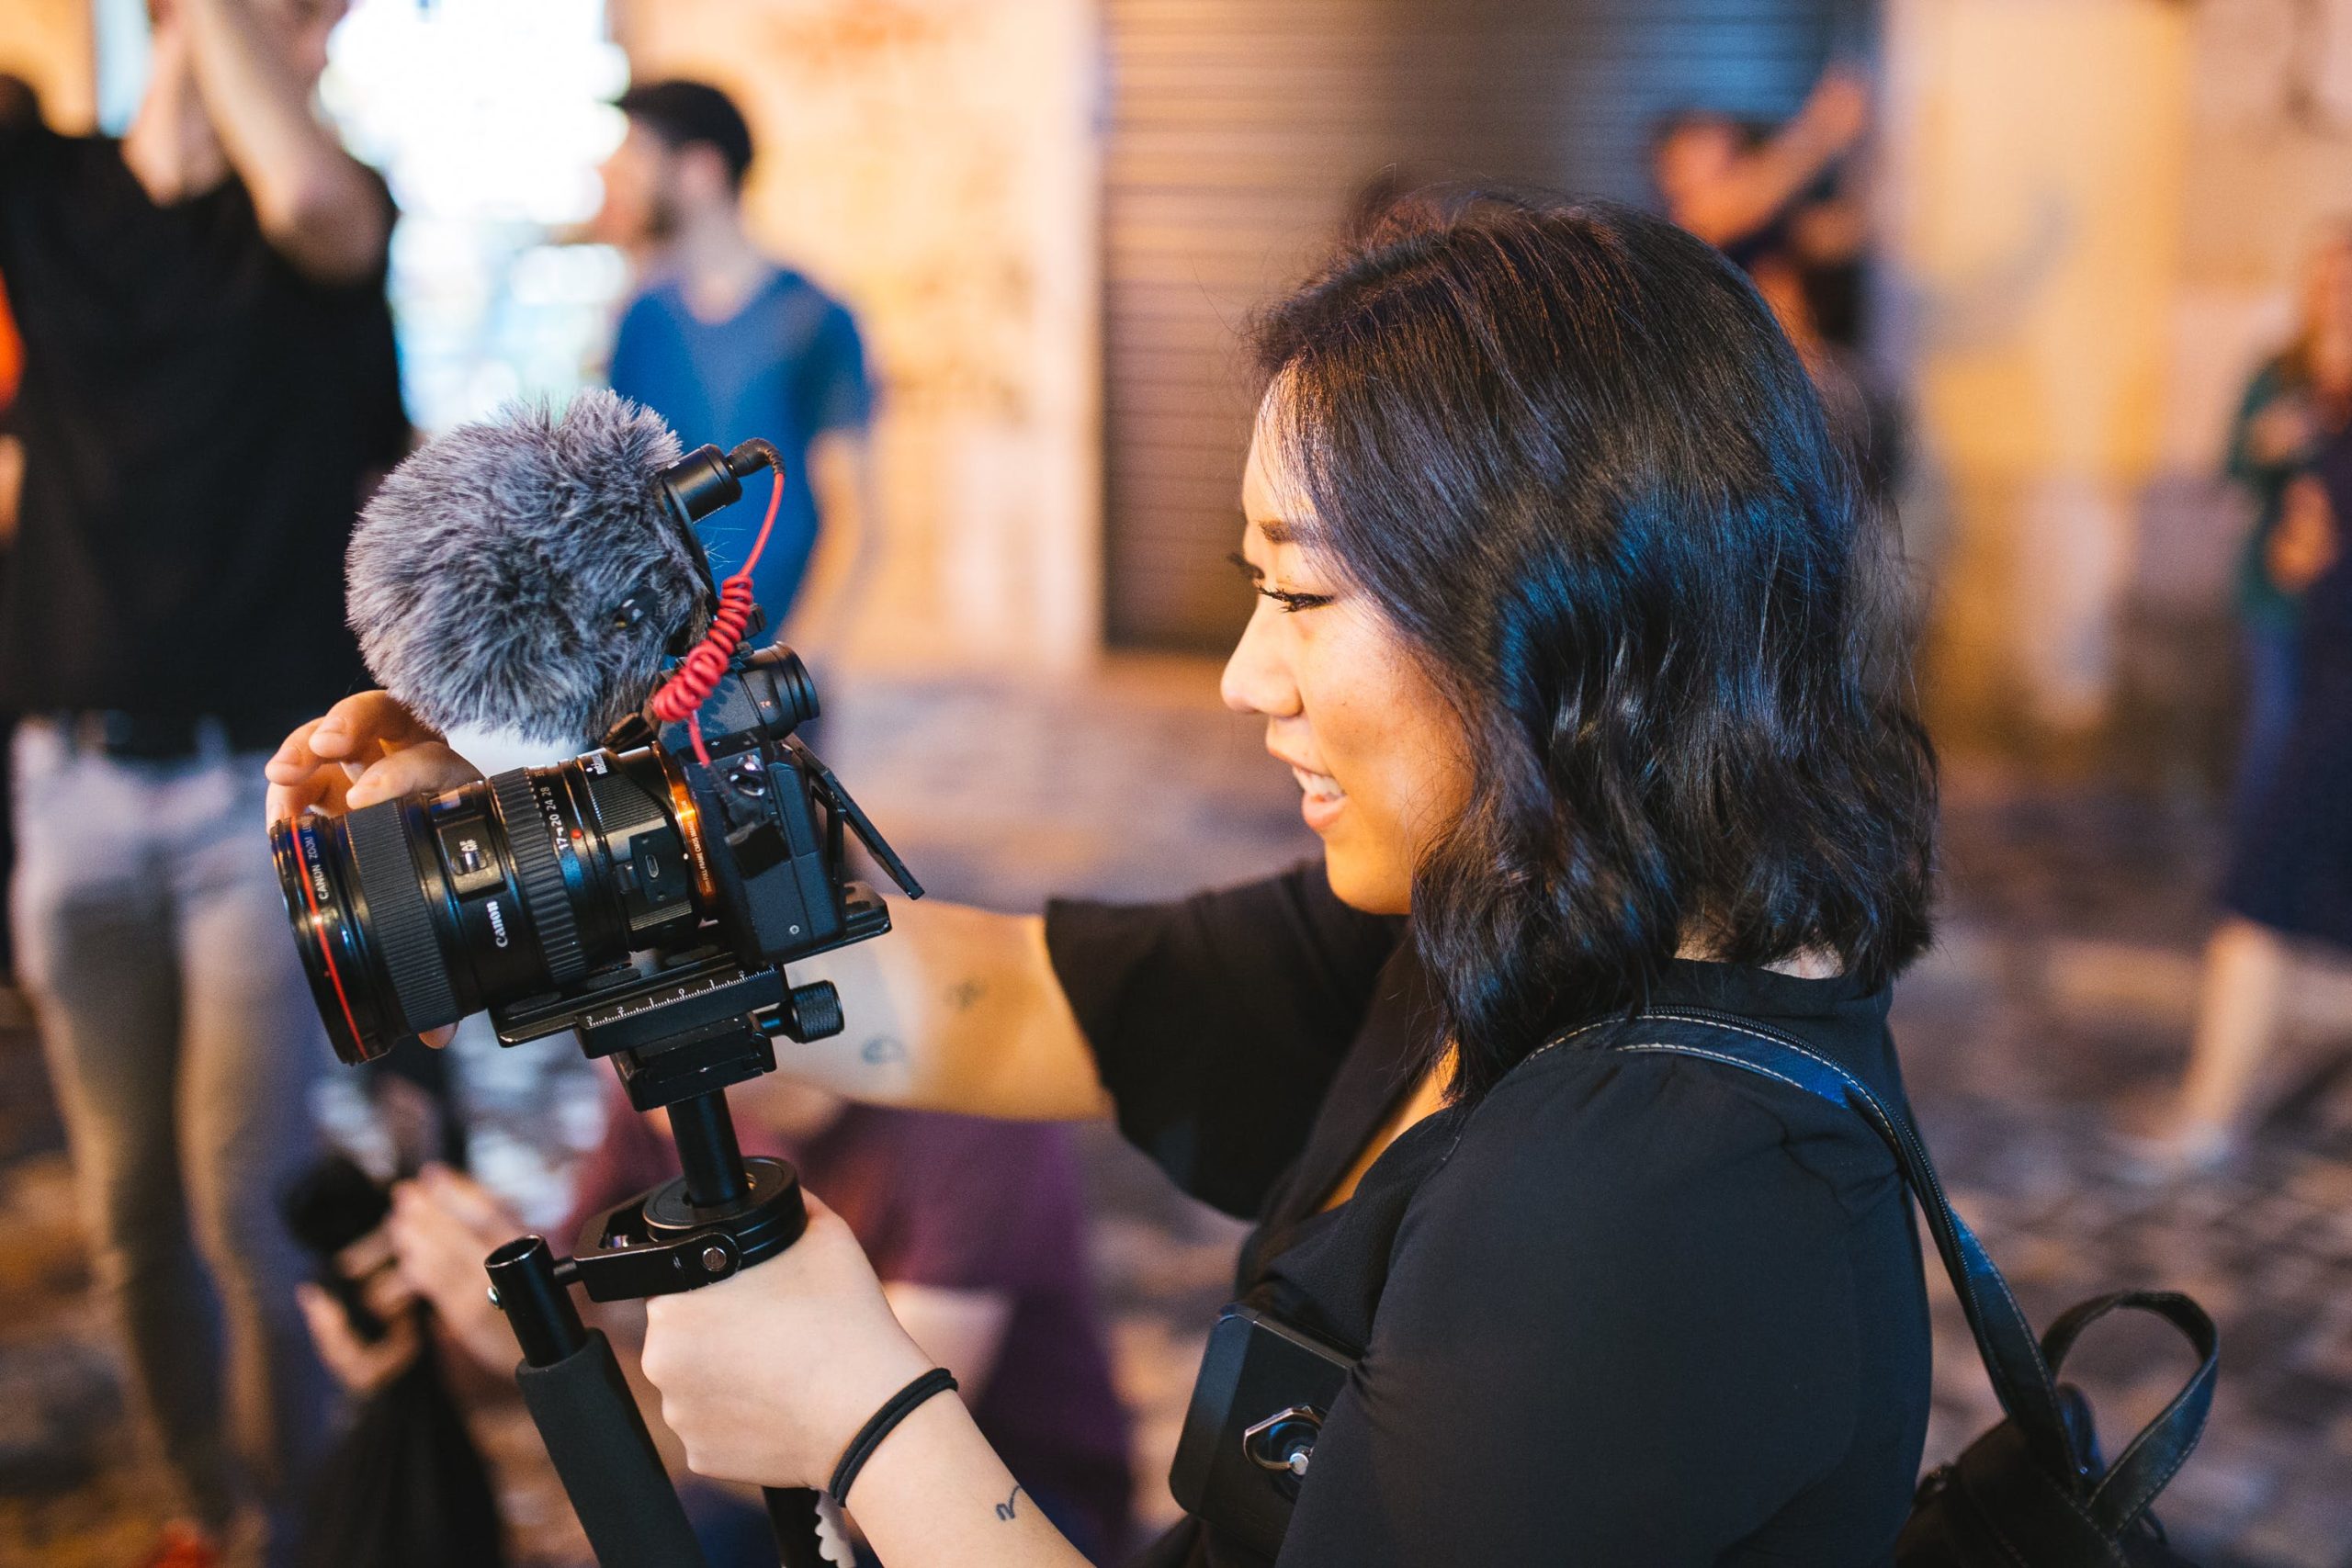
- Tripods and Stabilization: Keep your shots steady and eliminate shaky footage using a sturdy tripod or stabilization tools such as handheld gimbals or camera rigs.
- Lighting and Audio Equipment: Proper lighting enhances the visual quality of your videos. Consider investing in lighting equipment like softboxes, LED panels, or reflectors. Additionally, ensure clear and crisp audio by using external microphones, headphones for monitoring, and audio recording devices.
- Smartphone Cameras: Pay attention to the power of smartphone cameras for videography. They have become increasingly advanced, offering high-quality video recording capabilities and portability that can be advantageous in certain situations.
Remember, videography is about the equipment you use and the skills you develop. In the next section, we will delve deeper into choosing the right camera for your videography needs and explore important features to consider.
Choosing the Right Camera for Your Videography Needs
Regarding videography, selecting the right camera is crucial for achieving the desired results. This section will explore different camera types and the important features to consider.
Camera Types and Their Pros and Cons
- DSLR vs. Mirrorless Cameras: DSLR (Digital Single-Lens Reflex) and MILC (Mirrorless Interchangeable Lens Camera) cameras are popular choices for videography. DSLRs offer versatility, excellent image quality, and a wide range of lens options. On the other hand, mirrorless cameras are more compact, provide silent shooting, and often offer advanced autofocus features.
- Camcorders and Action Cameras: Camcorders are purpose-built for video recording and offer features like built-in zoom, image stabilization, and XLR audio inputs. Action cameras are small, rugged, and ideal for capturing dynamic and adventurous footage.
- Smartphone Cameras: Today’s smartphones boast impressive camera capabilities, making them a viable option for videography. They are convenient, portable, and can produce high-quality videos, especially in well-lit conditions. Additionally, smartphone camera apps often provide advanced features and manual controls.
Important Features to Consider
- Sensor Size and Resolution: Larger sensors generally offer better image quality and low-light performance. Resolution determines the level of detail in your videos, with options ranging from Full HD (1080p) to 4K and beyond.
- Frame Rates and Slow Motion Capability: Higher frame rates allow for smooth, cinematic footage. Consider cameras that offer variable frame rates for achieving slow-motion effects.
- Low Light Performance and ISO Range: Look for cameras with good low light performance, which is crucial for capturing well-exposed footage in challenging lighting conditions. A wide ISO range provides flexibility in adjusting exposure settings.
While expensive professional-grade cameras can undoubtedly offer superior video quality, you don’t necessarily need to break the bank to start creating engaging videos. Many affordable digital cameras and smartphones offer remarkable video capabilities, especially when paired with essential videography techniques such as utilizing the back camera, landscape mode, and overlay grids for composition.
Smartphone Cameras for Videography
Smartphone cameras have come a long way, offering impressive capabilities that make them a viable option for videography. Here are the advancements in smartphone camera technology, and share tips on maximizing the potential of your smartphone camera for videography.
Advancements in Smartphone Camera Technology
Smartphone manufacturers have made significant advancements in camera technology, equipping their devices with features that rival traditional cameras. These advancements include:
- Higher Megapixel Count: Smartphones now offer cameras with higher megapixel counts, allowing for sharper and more detailed footage.
- Optical Image Stabilization (OIS): OIS reduces camera shake, resulting in smoother and more stable footage.
- Improved Low Light Performance: Many smartphones feature larger image sensors and wider aperture lenses, enabling better performance in low light conditions.
- Advanced Image Processing: Smartphones use sophisticated image processing algorithms to enhance colors, reduce noise, and improve overall image quality.
Maximizing the Potential of Your Smartphone Camera
To make the most of your smartphone camera for videography, consider the following:
- Choosing the Right Smartphone with Excellent Camera Capabilities: Research and select a smartphone known for its exceptional camera performance. Look for devices with features like multiple lenses, manual controls, and advanced video recording capabilities.
- Utilizing Manual Controls and Settings: Explore your smartphone camera app’s manual controls and settings. Adjusting settings such as exposure, focus, white balance, and frame rate can give you more control over your footage.
- Smartphone Camera Accessories for Videography: Enhance your video with accessories like stabilizers, external microphones, wide-angle lenses, and tripod mounts. These accessories can improve your smartphone camera’s stability, audio quality, and versatility.
Remember, while smartphone cameras offer convenience and advanced features, they still have limitations compared to dedicated cameras. Lighting conditions, sensor size, and lens quality can affect video quality. However, with careful consideration and proper techniques, you can achieve impressive results with your smartphone camera.
Next, we’ll explore essential techniques for cinematic videography, including composition, camera movements, and shot types.
Essential Techniques for Cinematic Videography
Creating visually captivating videos involves mastering various techniques of cinematic videography. In this section, we will explore critical aspects such as composition, camera movements, and shot types that will elevate the quality and impact of your videography.
Composition and Framing
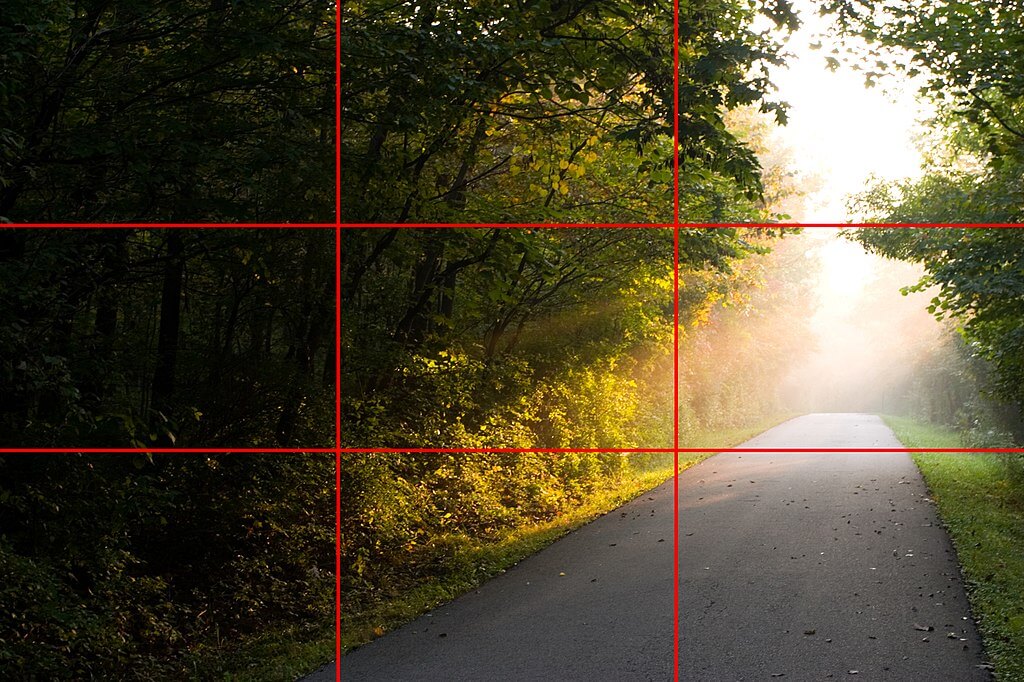
- Rule of Thirds: Divide your frame into a 3×3 grid and position key elements along the gridlines or at their intersections for balanced and visually pleasing compositions.
- Leading Lines and Symmetry: Utilize leading lines, such as roads or architectural features, to guide the viewer’s eye through the frame. Embrace symmetry for a sense of balance and harmony.
- Depth of Field: Create depth within your scenes by adjusting your aperture to control the depth of field. This technique adds visual interest and draws attention to specific subjects.

Mastering Camera Movements
- Panning and Tilting: Smoothly pan the camera horizontally or vertically to follow subjects or reveal new elements within the frame. Tilt the camera up or down for dramatic effect or to capture vertical aspects.
- Tracking Shots: Move the camera alongside or behind a subject to create a sense of movement and immerse the viewer in action.
- Crane and Steadicam Shots: Elevate your video with a crane for sweeping aerial movements or use a stabilizer like a Steadicam for smooth and fluid shots while walking or running.
Understanding Shot Types and Angles
- Wide Shots and Establishing Shots: Set the scene and provide context by capturing wide shots that showcase the environment and establish the location.
- Medium Shots and Close-Ups: Medium shots highlight the subject and their actions, while close-ups focus on specific details or emotions, adding intimacy and impact.
- High and Low Angles: Experiment with different views to influence mood and perspective. High angles provide an overview, while low angles convey dominance or vulnerability.
To further enhance your videography, keep the background simple and minimize clutter to draw attention to the subject. Pay attention to camera placement to avoid unattractive distortions, and consider using optical zoom instead of digital zoom for better image quality. Utilize manual focus to prevent autofocus issues and add creative effects like rack focus.
Remember, applying cinematic techniques is important to serve the story and engage your audience. Aim for shots that hold viewers’ attention for around 5 to 10 seconds, and consider using minimal camera movements to maintain focus and avoid visual distractions.
In the next section, we’ll delve into the world of lighting and color in videography, discussing techniques to set the mood and enhance the visual appeal of your videos.
Lighting and Color in Videography
Lighting and color play a crucial role in videography, setting the mood and enhancing the visual appeal of your videos. We will explore various techniques and considerations for effective lighting and color management.
Importance of Lighting in Setting the Mood
- Natural vs. Artificial Lighting: Consider the available lighting conditions and how they contribute to the desired atmosphere. Natural light can create a soft and organic look, while artificial lighting provides more control over the scene.
- Key, Fill, and Backlighting Techniques: Utilize key lighting as the primary light source to illuminate the subject. Fill lighting helps reduce shadows and balance the overall lighting, while backlighting adds depth and separation from the background.
Working with Color Temperature
- White Balance and Kelvin Scale: Set the white balance on your camera to ensure accurate color reproduction. Different light sources have varying color temperatures, measured in Kelvin (K). Adjusting the white balance provides consistent color temperature across multiple cameras and lighting conditions.
- Creative Use of Color Gels: Experiment with color gels placed over your lights to add creative effects or alter the color temperature. Gels can be used to create warmer or cooler tones, enhancing the mood of your videos.
Color Grading and Post-Processing Tips
- Introduction to Color Correction: Color correction involves adjusting the colors and tones in your footage to achieve a balanced and natural look. Correct any color imbalances and ensure consistency throughout your video.
- Enhancing the Cinematic Look: Color grading allows you to stylize your videos, creating a specific mood or aesthetic. Experiment with different color grading techniques to achieve the desired cinematic look, such as adding a subtle film grain or adjusting the color hues.
- Software and Tools for Color Grading: Explore dedicated video editing software that offers robust color grading tools. Popular options include Adobe Premiere Pro, DaVinci Resolve, and Final Cut Pro. Utilize color-grading plugins and presets to streamline your workflow and achieve professional-grade results.
Remember, when working with multiple cameras, aim for even exposure in scenes by setting the same exposure settings across all cameras. If possible, shoot in controlled lighting environments to have more consistency in your footage.
Next, we’ll dive into capturing clear and high-quality audio, discussing techniques and equipment for achieving professional sound in your videos.
Capturing High-Quality Audio for Your Videos
While visual elements are essential in videography, clear and crisp audio is equally important for creating a captivating and enjoyable viewing experience. This section will explore the importance of high-quality audio and provide tips for capturing pristine sound in your videos.
The Importance of Clear and Crisp Audio
Clear and intelligible audio is crucial for engaging your audience and effectively conveying your message. Poor audio quality can distract viewers and undermine the impact of your video. Paying attention to audio ensures that your videos are professional and immersive.
Choosing the Right Microphone for Your Needs
Selecting the appropriate microphone is essential for capturing high-quality audio. Consider the following types:
- On-Camera and Shotgun Microphones: On-camera microphones attach directly to your camera and capture sound from the direction the camera is pointing. Shotgun microphones are highly directional and excel at picking up sound from a specific subject while reducing ambient noise.
- Lavalier and Wireless Microphones: Lavalier (lapel) microphones are small and clip onto the subject’s clothing, providing hands-free audio capture. Wireless microphones offer mobility and flexibility, allowing the presenter to move freely while maintaining audio quality.
Tips for Recording Clean Audio
To ensure clean and professional audio in your videos, consider the following tips:
- Proper Mic Placement and Distance: Position the microphone close to the subject to capture clear and direct sound. Experiment with microphone placement based on the type of microphone used and the desired sound.
- Using Windscreens and Pop Filters: Attach windscreens to your microphone to minimize wind noise when recording outdoors. Pop filters help reduce plosive sounds caused by bursts of air, resulting in cleaner audio.
- Eliminating Background Noise: Choose a controlled recording environment to minimize background noise whenever possible. If you can’t control the setting, consider using a noise-canceling microphone or post-processing techniques to reduce unwanted noise.
Remember, capturing high-quality audio requires planning and attention to detail. Invest in a reliable microphone that suits your needs and prioritize proper mic placement and distance to capture clean and clear sound.
Storytelling and Editing in Videography
Crafting a compelling story and editing your footage are crucial aspects of videography that can elevate the impact of your videos. Next, we will explore the art of storytelling and provide insights into the editing process.
Crafting a Compelling Story for Your Videos
- Research the Subject: Invest time in understanding your subject matter to tell a better story and effectively transmit important information to your audience.
- Plan Your Shoot: Create storyboards, know the timeline for events, and prepare a shot list to capture key moments. This preparation will ensure you have the necessary footage to tell your story effectively.
- Focus on Storytelling: Consider elements such as premise, emotion, conflict, and resolution when crafting your story. Tailor your storytelling approach to resonate with your target audience and evoke the desired response.
Organizing and Importing Footage
- Organize Your Files: Maintain a well-structured folder system to keep your footage easily accessible. Use clear file naming conventions to quickly locate specific clips.
- Importing Footage: Transfer your footage to your editing software, ensuring that all files are properly organized and labeled for easy identification during the editing process.
Essential Editing Techniques and Tools
- Basic Cuts and Transitions: Use cuts to transition between shots and maintain visual continuity. Experiment with different transitions, such as fades, dissolves, and wipes, to enhance the flow of your video.
- Adding Text and Graphics: Incorporate text overlays, titles, and graphics to provide context, highlight key information, or add visual interest to your videos.
- Incorporating Music and Sound Effects: Select appropriate music tracks and sound effects to enhance the mood and atmosphere of your video. Ensure that the audio elements complement the visuals and contribute to the storytelling.
The editing process involves several stages, including organizing footage, syncing audio, reviewing footage, creating a rough cut, fine-tuning shots, and making final edits. Stay focused on your storytelling goals and make deliberate choices to effectively convey your message during the editing process.
In the next section, we’ll provide valuable tips on promoting your videography work and growing your online presence as a content creator or videographer.
Sharing and Promoting Your Videography Work
Creating awesome videos is only part of the equation. To gain exposure and reach a wider audience, it’s essential to actively share and promote your videography work. In this section, we’ll explore strategies for building an online presence, selecting the right platforms for sharing your videos, and optimizing your videos for search engines.
Building an Online Presence
- Create a Website or Portfolio: Establish a professional online presence by creating a website or portfolio where you can showcase your best work, provide information about your services, and offer a way for potential clients or collaborators to contact you.
- Engage on Social Media: Actively participate on social media platforms relevant to your target audience. Share behind-the-scenes content, teasers, and snippets from your videos to generate interest and engage with your followers.
Choosing the Right Platforms for Sharing Videos
- YouTube and Vimeo: Upload your videos to popular video-sharing platforms like YouTube and Vimeo. These platforms provide a vast audience and robust video management tools for organizing and promoting your videos.
- Social Media Channels: Utilize social media platforms such as Instagram, Facebook, TikTok, Twitter, and LinkedIn to share your videos. Each channel offers unique features and audience demographics, so tailor your content and approach accordingly.
Optimizing Videos for Search Engines
- Utilize Keywords: Conduct keyword research to identify relevant terms and phrases related to your videography niche. Incorporate these keywords in your video titles, descriptions, and tags to improve visibility and search engine rankings.
- Write Compelling Descriptions: Craft informative and engaging descriptions for your videos. Provide a concise content summary, include relevant keywords, and include links to your website or social media profiles.
- Add Closed Captions: Including closed captions in your videos not only makes them more accessible but also improves search engine optimization. Search engines can index the text within captions, leading to better visibility in search results.
By building a strong online presence, leveraging popular platforms for sharing videos, and optimizing your videos for search engines, you can expand your reach and attract a larger audience for your videography work.
Conclusion
We hope this guide has provided valuable insights and actionable tips for content creators and videographers to enhance their skills and create professional videos. We’ve covered essential aspects such as understanding the fundamentals of videography, choosing the right camera, mastering techniques for cinematic shots, utilizing lighting and color, capturing high-quality audio, storytelling and editing, and sharing and promoting your videography work.
By applying the knowledge and techniques shared in this guide, content creators can take their videos to the next level. But we want to take it a step further. That’s why we developed the RECnGO app, the ultimate mobile video studio and live streaming app for video content creators and streamers. With RECnGO, you can replace complicated and expensive live-streaming equipment and effortlessly stream in studio quality using your mobile devices.
Here are some of the key features that make RECnGO stand out:
- Seamless Live Streaming: Stream to platforms like Facebook, YouTube, or custom RTMP destinations with ease and studio quality.
- Multi-Camera Support: Link up to 12 phones, tablets, or DSLR/MILC cameras into a live streaming chain, allowing you to switch between camera angles for a more immersive streaming experience.
- Convenient Camera Control: Switch between front and back cameras without walking up to the device during your streams, giving you greater flexibility and control.
- Independent Audio Mixing: Adjust and balance the sound for each device independently using the studio device’s audio mixer, ensuring optimal audio quality for your streams.
- Fine-Tune White Balance: Adjust the white balance individually on all connected cameras, guaranteeing consistent and professional-looking visuals.
Download RECnGO today and unleash the full potential of your videography skills. With our app and the knowledge gained from this guide, you have everything you need to create professional videos and captivate your audience.
Thank you for joining us on this videography journey, and we look forward to seeing the amazing videos you’ll create!


